Posts

Showing posts from 2007

Portrait Tips

Image
Here are some excellent potrait tips that you will learn when taking a shot. 1. Don't Just Sit There... Static portraits —with the subject just slouched there, or stiffly posed, are not terribly appealing. It generally pays to play director as well as photographer when you're photographing people. Don't just hide behind the camera; interact with your subject. Tell a joke, have a conversation, do something silly, or even tell the subject what to do. The results will be be much more interesting portraits, and the session will be a lot more fun for you and your subject. 2. Use the Right Lens The right lens for a portrait is the one that provides the desired framing at a distance that provides the desired perspective. For a natural-appearing "head shot," this would be a short telephoto (85–135mm range for a 35mm camera), at a distance of around 31/2–5 feet from the subject. Use a wider lens, and you have to move closer to frame a head shot, and moving closer will expa

Nikkor Lense (Normal)

Image
To capture an angle of view that approximates that of the human eye, Nikon has developed these lenses to provide a 46 ° picture angle, which are useful for landscape and candid shots. AF Nikkor 50mm f/1.8D With the modification of other AF Nikkor lenses from S-type to D-type, the entire AF Nikko r lineup is now comprised of D-type and G-type lenses. This D-type Nikkor lens, like all other Nikkor D- and G-type lenses, relays subject-to-camera distance information to AF Nikon camera bodies. This then makes possible advances like 3D Matrix Metering and 3D Multi-Sensor Balanced Fill-Flash. The lens delivers superior optical performance thanks to the incorporation of hi gh-grade Nikon Super Integrated Coating. AF Nikkor 50mm f/1.4D High-performance standard lens. Distortion-free images with superb resolution and color rendition. An ideal first lens, perfect for full-length portraits, travel photography or any

Nikkor Lense (DX)

Image
With the significant rise in the popularity of Nikon's digital SLRs, the DX Nikkor lens line-up have been developed to deliver higher optical performance to meet the demands of professional and advanced amateur digital SLR users. AF-S DX NIKKOR 18-55mm f/3.5-5.6G VR (3.0x) new With built-in Silent Wave Motor and Vibration Reduction, this compact, lightweight and affordable 3x zoom NIKKOR lens offers remarkable versatility and covers the essential focal range of 18 to 55mm. When mounted on any DX-format Nikon digital SLR camera, the picture angle is equivalent to that produced by a 27 to 82.5mm focal length lens on a 35mm-format film camera or Nikon FX-format came ra. AF-S DX VR Zoom-Nikkor 55-200mm f/4-5.6G IF-ED The AF-S DX VR Zoom-Nikkor 55-200mm f/4-5.6G IF-ED is a compact and lightweight 3.6x zoom lens featuring a host of state-of-the-art optical technologies such as the Vibration Reduction (VR), Nikon ED glass element

How to Take Great Group Photos

Image
1. Prepare There is nothing that will make of people posing for a photograph turn upon you faster than you not being prepared. People don’t like to be kept waiting so think ahead about some of the following aspects of your photo: scope out the location of your shot before hand think ahead about how you will pose people and frame your shot one of the group’s head hiding behind another person make sure everyone you want in the shot knows you want them a few minutes ahead of time make your your camera is on and has charged batteries 2. Location The place that you have your group stand is important to group shots for a number of reasons. For starters it can give the photo context - for example a shot of a sporting team on their playing field means more than a shot of them in front of a brick wall. The other reason that choosing locations carefully is important is that it can have distractions in it. Choose a position where your group will fit, where there is enough light for th

Bokeh and DOF (depth of field) tips

Image
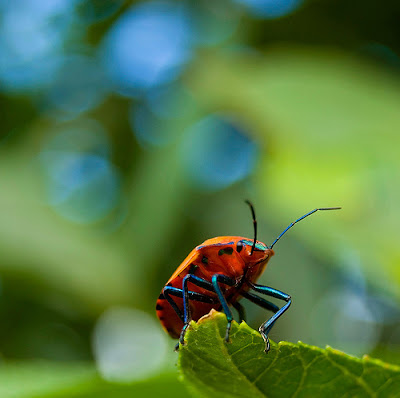
What is bokeh and DOF? Depth of field (DOF), refers to the area of an image that is in focus. You have most likely seen images where the main subject is in focus, while the background is out of focus or totally blured. The area that covers the focused area is the DOF (depth of field). Bokeh on the other hand, refers to the appearance of the light that is seen within the blured part of the photograph. Bokeh and DOF are important to consider for photographs when you need the main subject to stand out on its own and not be lost in background distractions. Isn't Bokeh and DOF the same thing? No, bokeh and depth of field is not the same thing, although they do work together. DOF is seen in a photograph where there is an obvious focus area, set against a blured background or foreground. Bokeh on the otherhand, refers to how your camera lens renders the light that is seen within the blured parts of the image.

Introduction to Shutter Speed in Digital Photography

Image
Shutter sp eed is measured in seconds - or in most cases fractions of seconds. The bigger the denominator the faster the speed (ie 1/1000 is much faster than 1/30). In most cases you’ll probably be using shutter speeds of 1/60th of a second or faster . This is because anything slower than this is very difficult to use without getting camera shake. Camera shake is when your camera is moving while the shutter is open and results in blur in your photos. If you’re using a slow shutter speed (anything slower than 1/60) you will need to either use a tripod or some some type of image stabilization (more and more cameras are coming with this built in). Shutter speeds available to you on your camera will usually double (approximat ely) with each setting. As a result you’ll usually have the options for the following shutter speeds - 1/500, 1/250, 1/125, 1/60, 1/30, 1/15, 1/8 etc. This ‘doubling’ is handy to keep in mind as aperture settings also double the amount of light that is let in

Introduction to Aperture in Digital Photography

Image
What is Aperture? Aperture is ‘the size of the opening in the lens when a picture is taken.’ When you hit the shutter release button of your camera a hole opens up that allows your cameras image sensor to catch a glimpse of the scene you’re wanting to capture. The aperture that you set impacts the size of that hole. The larger the hole the more light that gets in - the smaller the hole the less light. Aperture is measured in ‘f-stops’. You’ll often see them referred to here at Digital Photography School as f/number - for example f/2.8, f/4, f/5.6,f/8,f/22 etc. Moving from one f-stop to the next doubles or halves the size of the amount of opening in your lens (and the amount of light getting through). Keep in mind that a change in shutter speed from one stop to the next doubles or halves the amount of light that gets in also - this means if you increase one and decrease the other you let the same amount of light in - very handy to keep in mind). Depth of Field and Aperture There are a

Flash Technique

A basic guide showing the principles of flash photography.

Manual Metering standard setting (DSLR user only)

Image
Use " manual metering " for this setting. This is the standard setting when taking photos for manual metering. Just remember this few settings and you will be on your way to take great photos.

How To Make Money From Micro Stock Photography?

Image
Stock photography agents are companies that represent photographers and sell their photographs "right of use" graphic artists, news papers and advertising companies. One of the evolving domains in stock photography is called "micro stock". A micro stock agency, as the name implies, is a stock agency that deals with low (micro) price - about a dollar - photographs. Usually the micro stock agencies will restrict the uses allowed for a photograph. Filtering and Choosing Photographs When you are choosing your portfolio, consider the following point: Does your photograph has a value as an illustration or as a concept or idea that a customer can benefit from? For example, a photograph of a businessman in a suit climbing a mountain will sell better that a macro shot of a mosquito on a pinhead. A lady holding a disk in one hand and a handful of dollar notes on the other hand, will sell better the a photograph of a hippopotamus chasing a koala bear. This has nothing to

Horizontal or Vertical Photos?

Horizontal or Vertical? Many photographers never think to turn their cameras on their sides to capture a vertical image. Horizontal photographs are sometimes referred to as "landscape," while vertical photos are referred to as "portrait." If you are taking a photograph of a single person, then it's probably a good idea to take it vertically. This will prevent the person from being surrounded by blank space. Even when you are shooting actual landscapes, you might find that a vertical view makes for a more dynamic composition. Always ask yourself if horizontal or vertical would be better before you take a photograph. It may be readily apparent, based on your subject and its surroundings. If it isn't, take one of each shot and decide which you like better when you see the prints.

Kek Lok Si Trip

Image
The Buddhist temple of Kek Lok Si is situated in (H)Air Itam, a suburb of Georgetown. You can make that by local bus from the Komtar, but you can also make it by taxi. I prefer taxi, because the taxi takes me up the hill (the Kek Lok Si is halfway on a hill). I like to walk down, but not to walk up the hill in a tropical climate. Taxi ride from the KOmtar in Georgetown will cost you about RM20.- The temple was begun in 1890 and, from all appearances, construction really hasn't ever stopped. And it's still going on! The temple is supposedly the largest in Malaysia. The Kek Lok Si project was inspired by the chief monk of the Goddess of Mercy Temple of Pitt Street. With the support of the consular representative of China in Penang, the project received the sanction of the Manchu Emperor Kuang Hsi, who bestowed a tablet and gift of 70,000 volumes of the Imperial Edition of the Buddhist Sutras.

Seven Tips for Taking Great Photos

Shoot at the highest resolution you can While high-res pictures will take up more space on your digital camera's memory card, shooting big gives you the most flexibility later. Shooting at a higher resolution guarantees that when the magic strikes, you've captured the picture at the highest quality level. So whether you want to crop the picture to show a special detail or print at a large size, you'll have plenty of detail to work with. Get comfortable with your digital camera settings In addition to auto, most digital cameras have a variety of settings calibrated for special situations-like the bright light of the beach, or the muted light of a museum. Take a moment to familiarize yourself with these before you start shooting. This will let you adjust settings without consulting your manual. Take lots of pictures The best way to get good photos is to shoot often. Try shooting the same subject from a variety of angles: low, high, side view, close up and far away. If your ca

Best Time To Take Photography

The most important element to many great photographs is the lighting. Warmth, depth, texture, form, contrast, and color are all dramatically affected by the angle of the sunlight, and thus the time of day. Shooting at the optimum time is often the biggest difference between an 'amateur' and a 'professional' shot. In the early morning and late afternoon, when the sun is low, the light is gold and orange, giving your shot the warmth of a log fire. Professional photographers call these the 'magic hours' and most movies and magazine shots are made during this brief time. It takes extra planning, but saving your photography for one hour after sunrise, or one to two hours before sunset, will add stunning warmth to your shots. 5am: Pre-dawn: A pink, ethereal light and dreamy mist for lakes, rivers and landscapes. 6-7am: Dawn: Crisp, golden light for east-facing subjects. 7am-10am: Early morning: The city comes to life; joggers in the park. 10-2pm: Midday: The sun

Ten Tips For Better Photography

1. Hold It Steady A problem with many photographs is that they're blurry. Avoid 'camera shake' by holding the camera steady. Use both hands, resting your elbows on your chest, or use a wall for support. Relax: don't tense up. You're a marksman/woman holding a gun and it must be steady to shoot. 2. Put The Sun Behind You A photograph is all about light so always think of how the light is striking your subject. The best bet is to move around so that the sun is behind you and to one side. This front lighting brings out color and shades, and the slight angle (side lighting) produces some shadow to indicate texture and form. 3. Get Closer The best shots are simple so move closer and remove any clutter from the picture. If you look at most 'people' shots they don't show the whole body so you don't need to either. Move close, fill the frame with just the face, or even overflow it. Give your shot some impact. Use a zoom to crop the image tighter. 4. Choo

Rule of Thirds

Rules of Composition

Camera Interactive

Cameras Interactive aims to help novice photographers grasp the main concepts of SLR photography. The Flash-based Virtual Camera gives users hands-on experience operating an Single Lens Reflex (SLR) camera. Four tutorials explain focusing, aperture, shutter speed and exposure. Visit: http://www.camerasinteractive.com/home.php#

How to check Shutter Count? (For Nikon user)

Check out this site. If you are looking for software that can check "shutter count". Here it is. Visit: http://regex.info/exif.cgi/ and http://scent.org/cgi-bin/exif.cgi Just choose the image from your computer or URL and voila. You can check a lot of Exif info from your image taken from shutter speed, aperture, ISO, shutter count and so on.